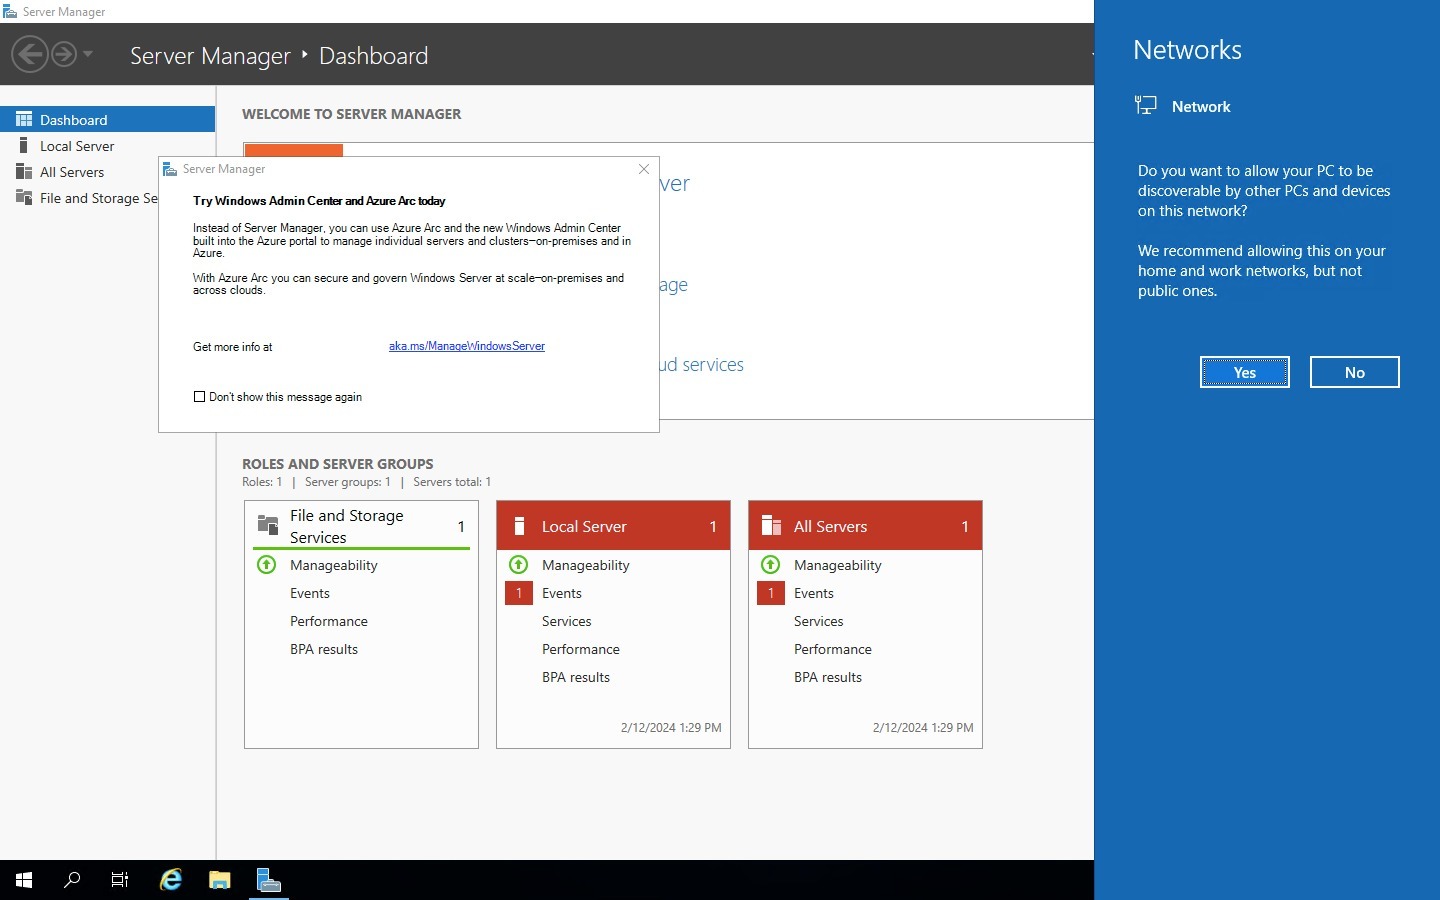
How to setup RDP on an Azure VM
Read Me
How to setup RDP on an Azure VM
Introduction
I wants to secure a Network Traffic to ensure that access to virtual machines is restricted. To do this, I need to:
- Create and configure network security groups.
- Associate network security groups to virtual machines.
- Connect on an Azure virtual machine using RDP
- Deny and allow access to the virtual machines by using network security groups.
To create a secure network, there are 4 main steps we will take:
- Create a virtual machine.
- Create a network security group(NSG)
- Configure an inbound security port rule to allow Remote Desktop Protocol (RDP)
- Configure an outbound security port rule to deny internet access
Create a virtual machine(VM).
I want to create a virtual machine.
- From the Azure Portal click “All Services”
- Click “Virtual Machines”
- Click on “Create ” and choose “Virtual machine”
- On the Basic Tab in the “Resource group” input.
- If you don’t have a resource group, click create resource group and provide a name for the resource group.
- If you already have one input in.
- Fill in your virtual machine name on the “Virtual machine name” input.
- Leave every other info as default.
- Scroll down to “Create a virtual machine” - Input your username - Password - Confirm Password
- On the “Public inbound ports” select none and proceed to Networking tab with two clicks on the next button.
- On the “NIC network security group” choose “”None
- Click “Next” twice to “Monitoring”. On the “Boot diagnostics” click “Disable”
- Leave default and click “Review and Create”
- Click “create” to create a new VM
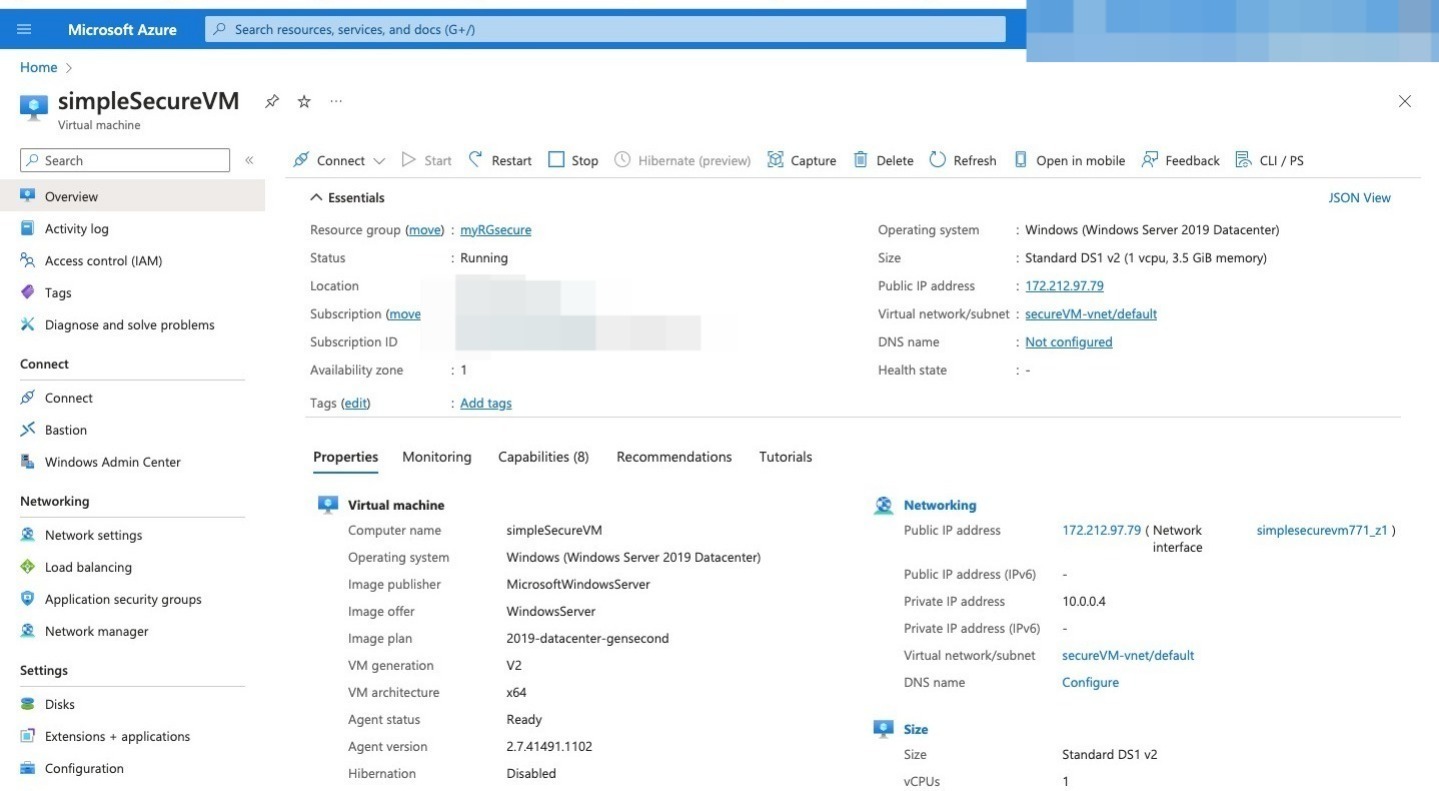
- When deployment complete, scroll down and “Go to resource”
- On the VM, scroll to “Networking”, and click “Network Setting”
- Copy the network interface, because you will need it.
Create a network security group
- From the Azure Portal click “All Services”
- Search for and select “network security group”
- Click on “Create ” and fill in the details.
- Click “review and create” and click “create”
- When its completed click “go to resource”
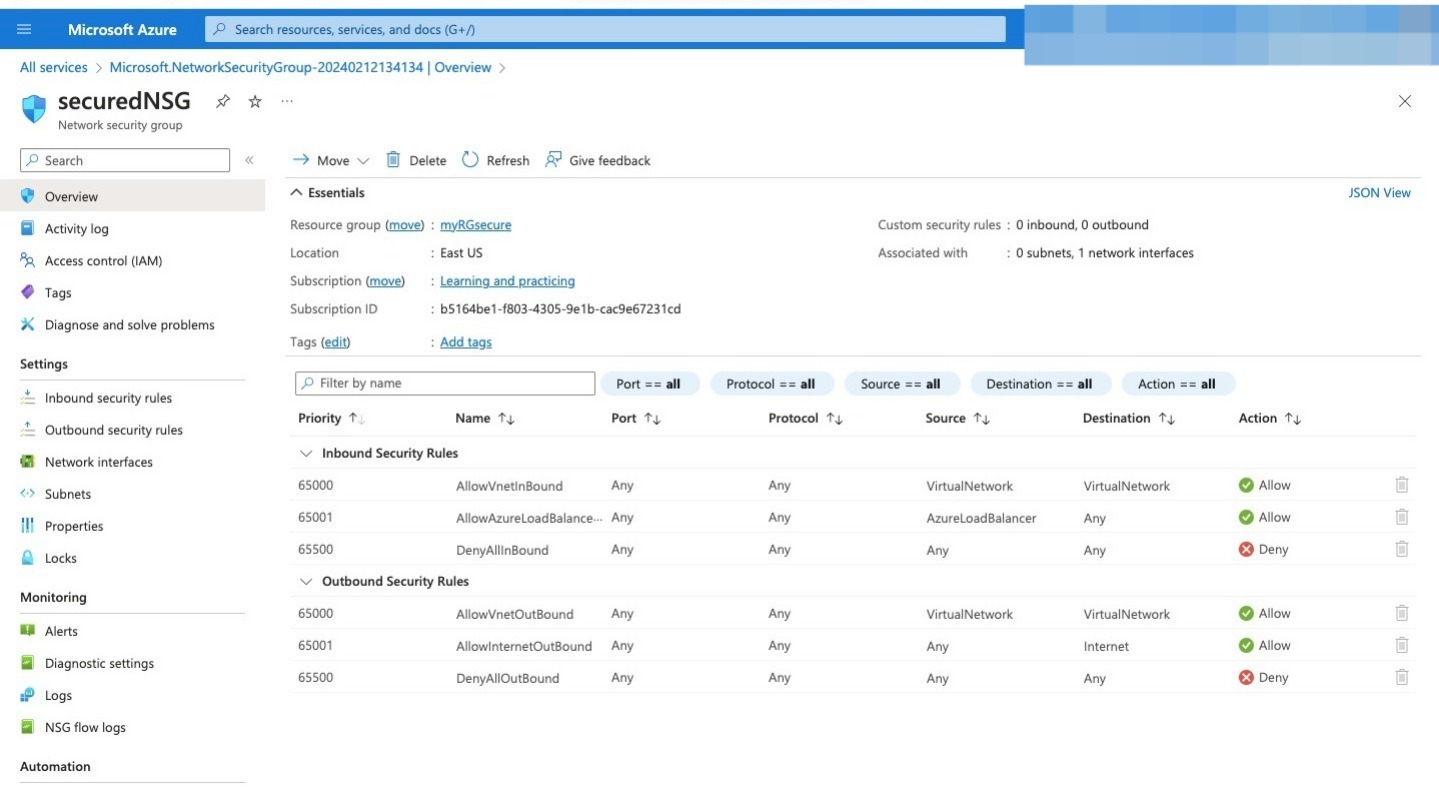
- On the NSG page go scroll the “Network interface” and click on it
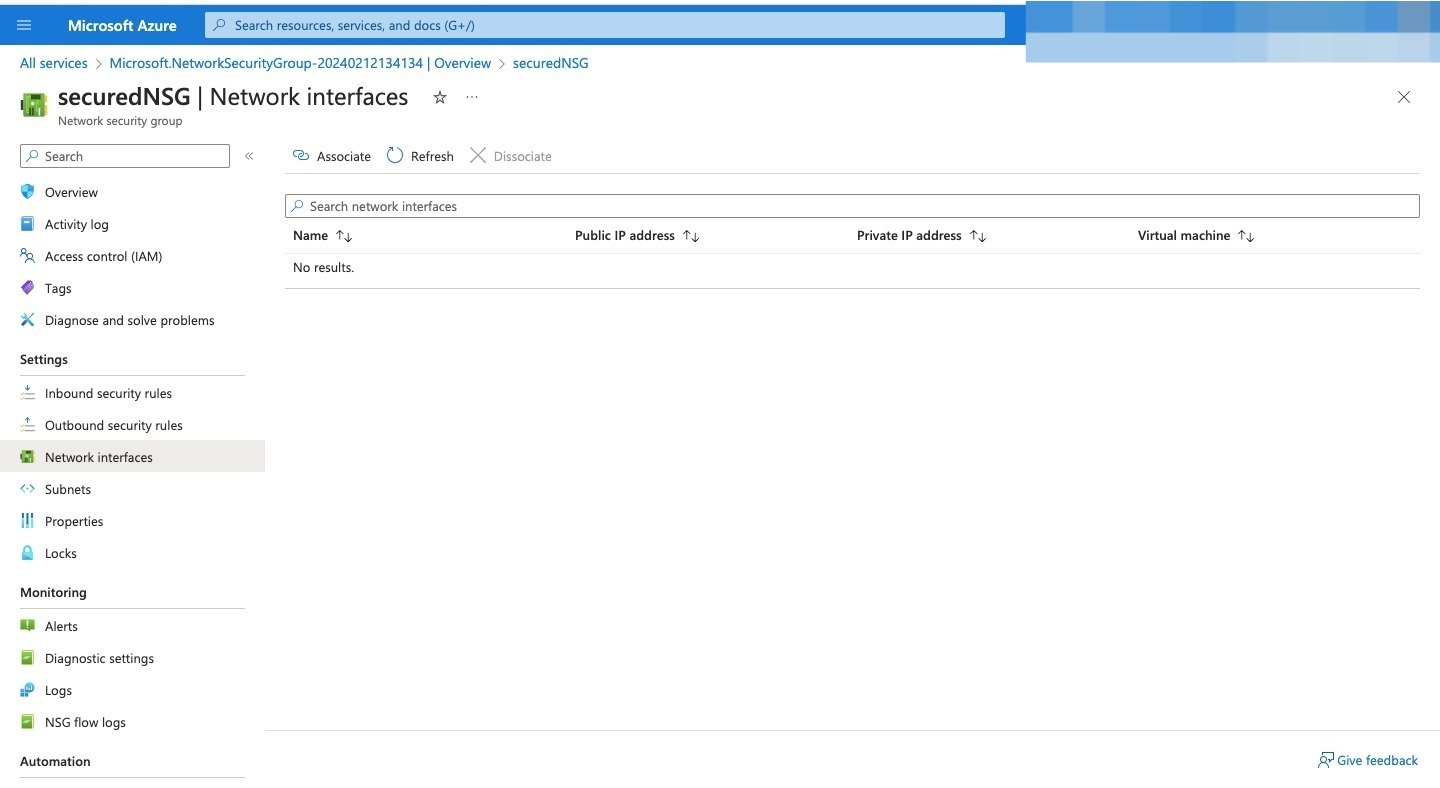
- Next, click “associate” on the tab
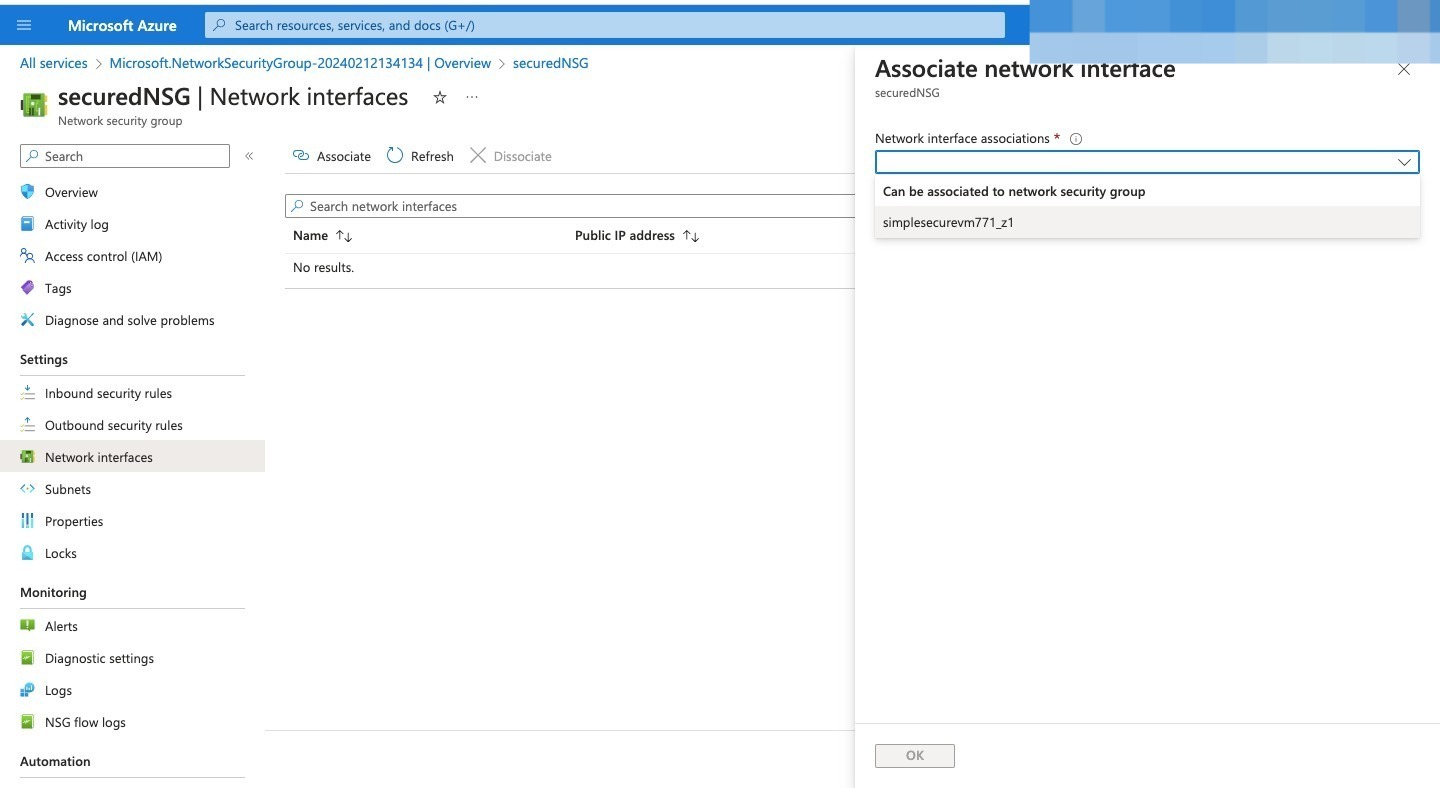
- Click the “Network interface association” dropdown arrow
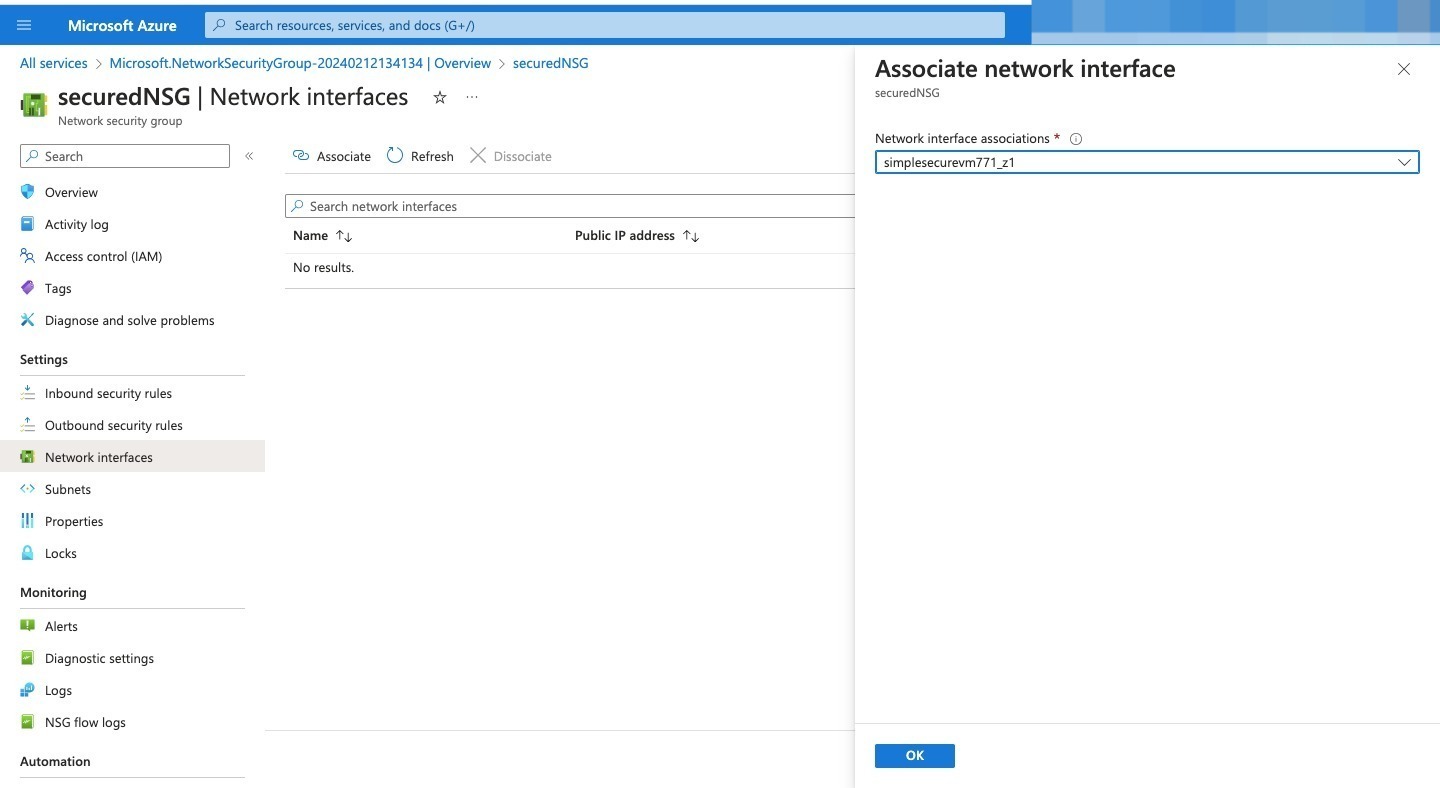
- Select the network interface and click “OK”
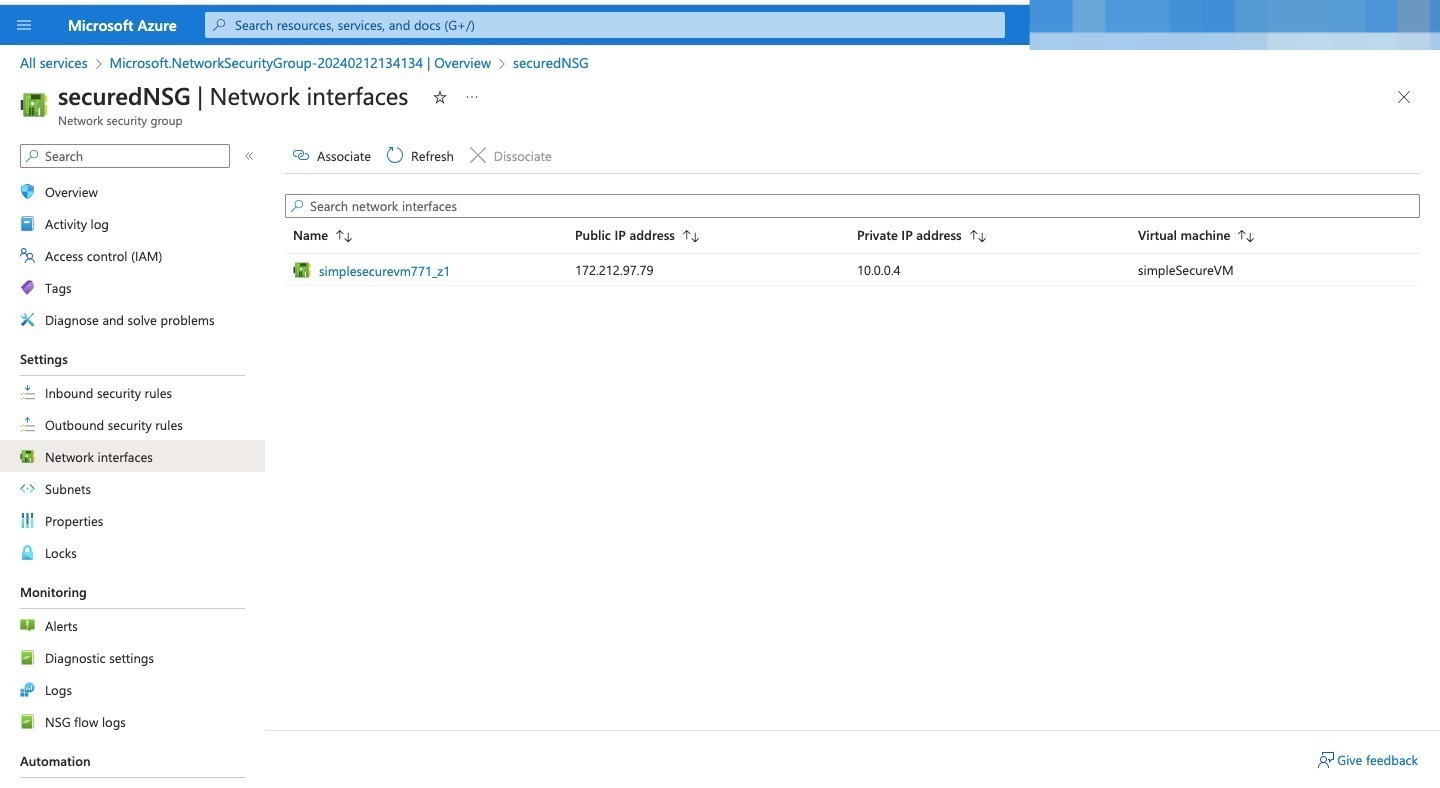
How to allow an RDP traffic to the virtual machine by configuring an inbound security port rule
By default NSG does not allow RDP. So we need to configure an inbound security rule to allow RDP
- Go back to your already created virtual machine and click on “Network Setting”
- Select the “create port rules” and choose “inbound port rule”
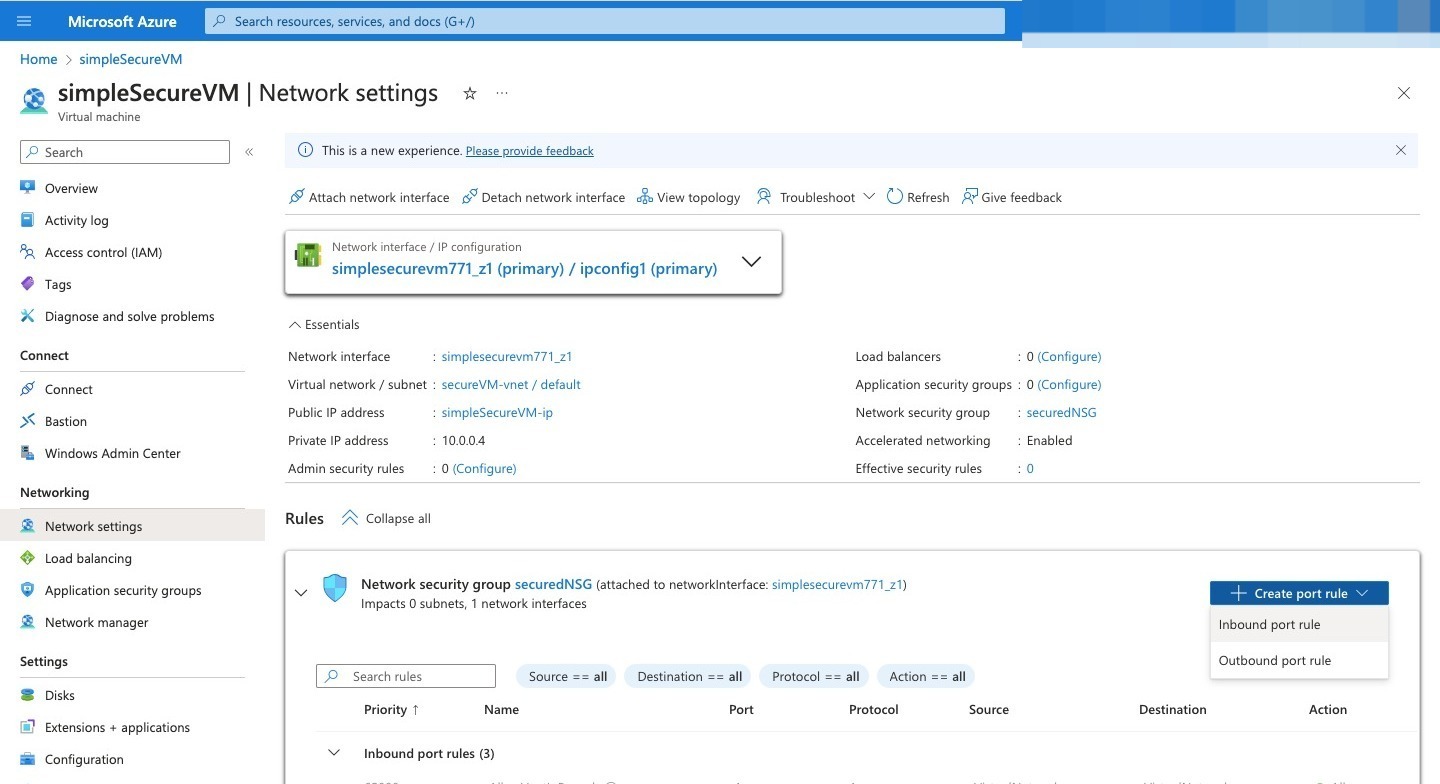
- Input a “Destination port ranges” and a “priority”
- Select “TCP”
- Add a “name”
- Click ”Add“
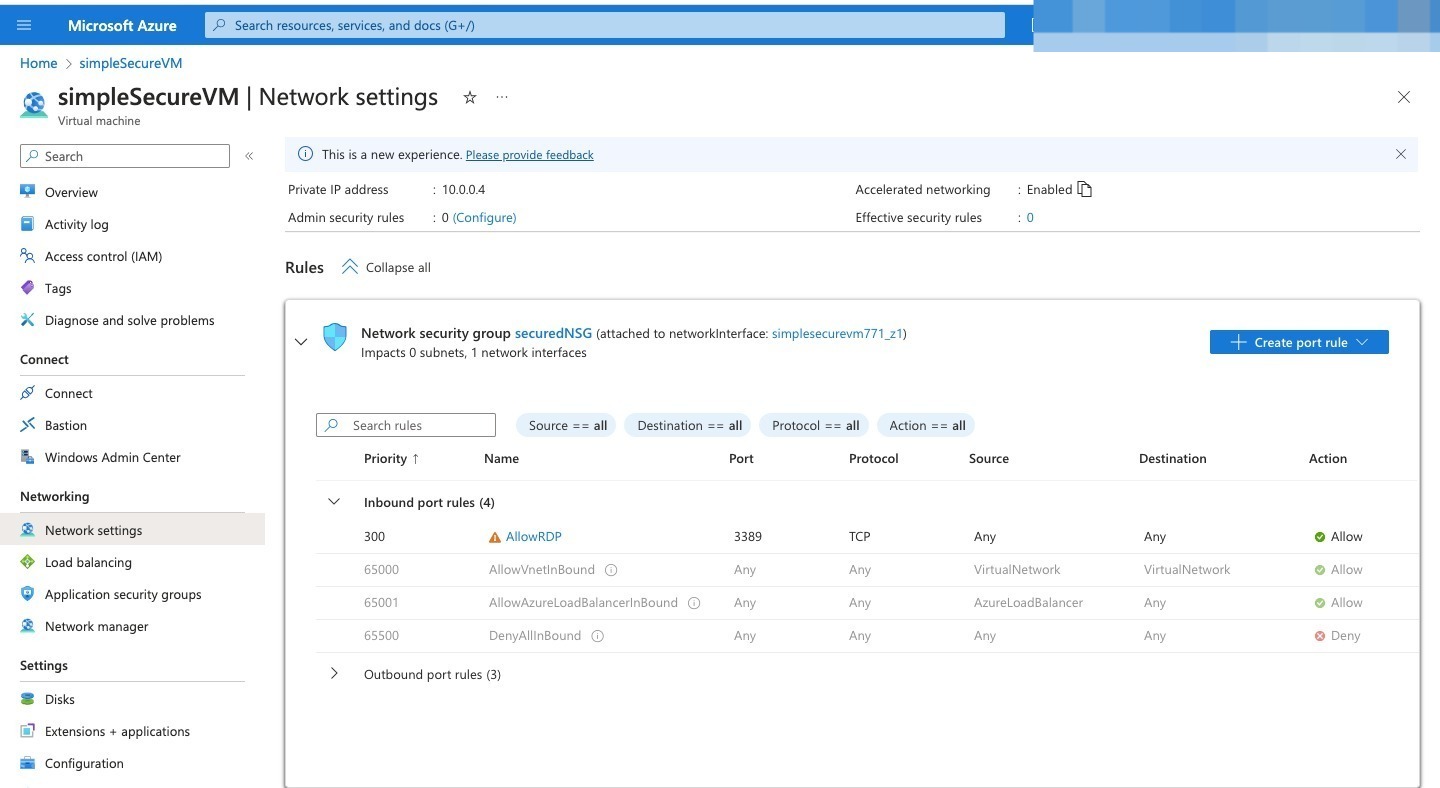
How to connect to RDP
- Go to the “Overview” of the VM
- Click on “Connect”
- Click on “Download RDP File”
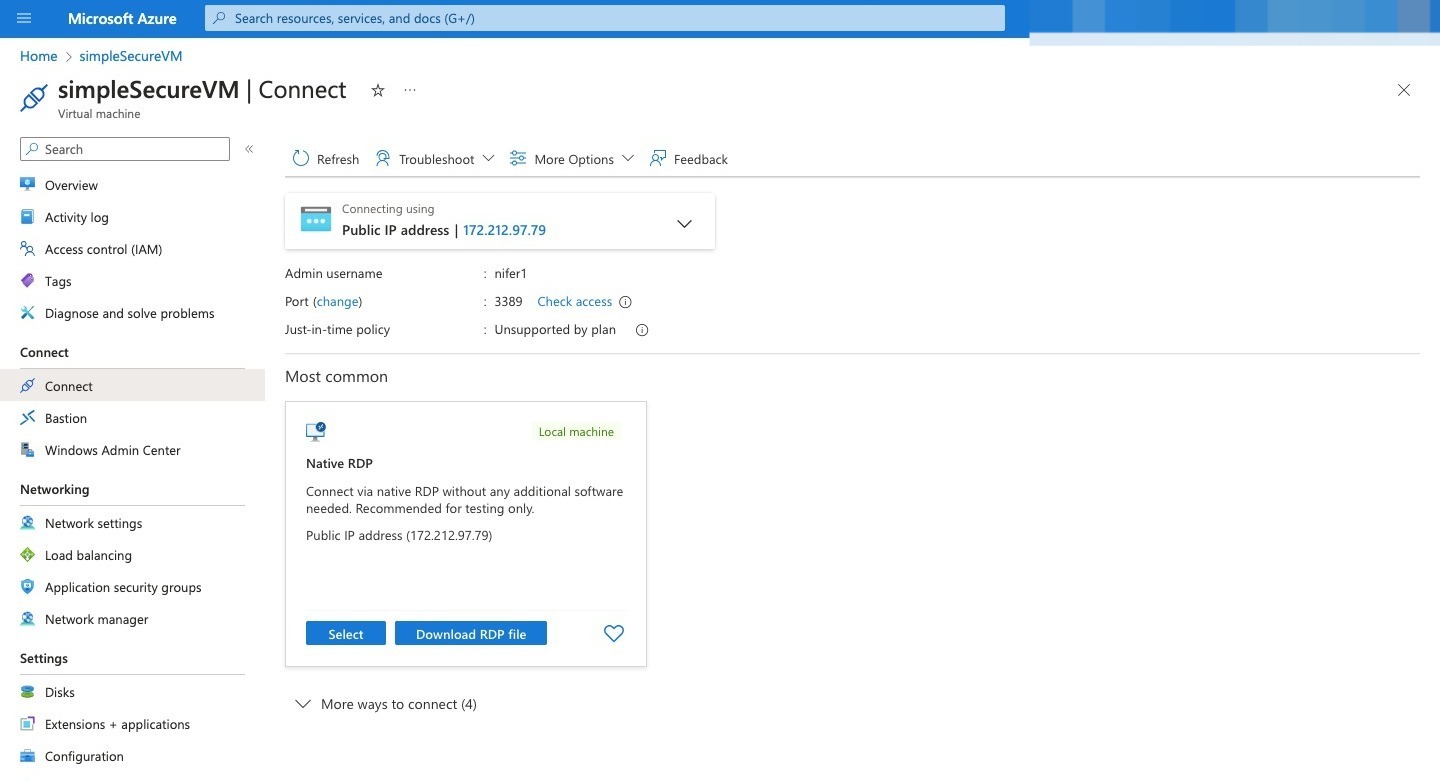
- Download, input details and continue
- There you go, your VM is ready.

Configure an outbound security port rule to deny internet access
- Go to your VM and click on “Network Setting”
- Select the “create port rules” and choose “outbound port rule”
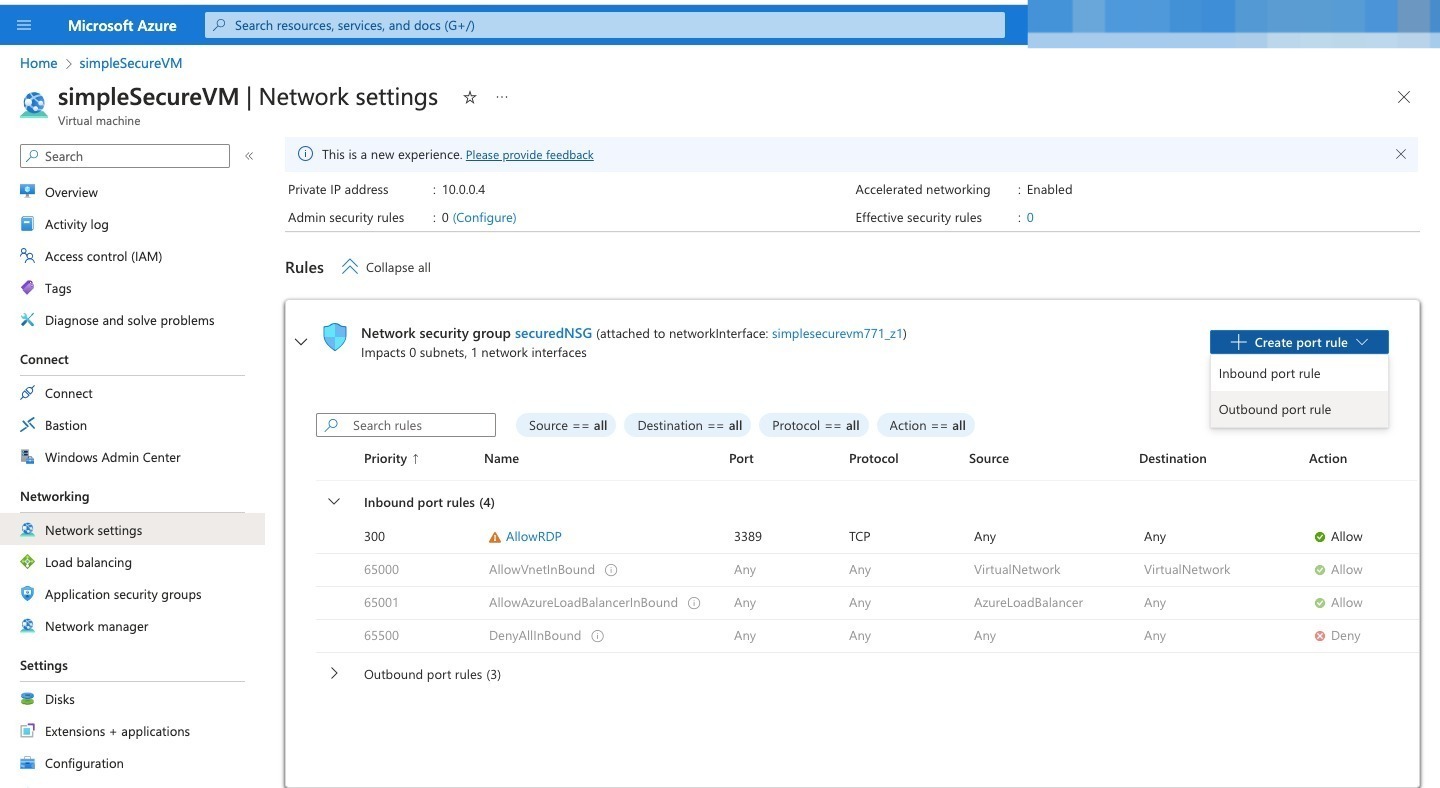
- On destination input, “Service Tag”
- On “Destination port ranges” put “*” which means all ports
- On ”Protocol” select “TCP”
- On “Action” select “Deny”
- Input a high Priority
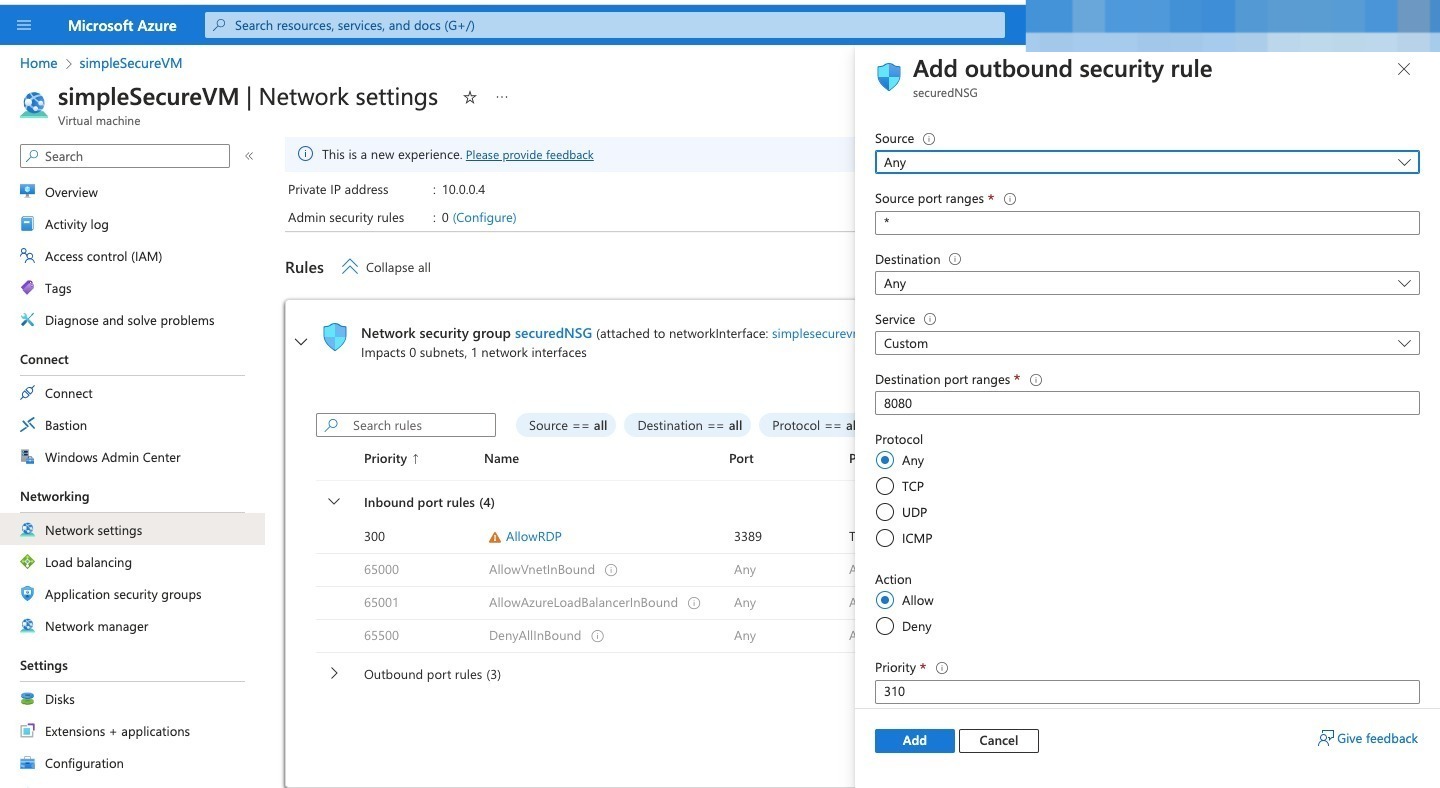
- Add name and click on “Add”
- Return to your RDP session and try to open a website , you will notice its not opening, because access has been denied.
